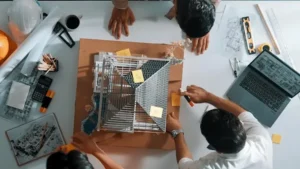
Choosing the right prototyping method is one of the most critical decisions in product development. Whether you’re building an early-stage concept model or a functional pre-production prototype, the method you choose directly affects cost, time, quality, and scalability.
For years, injection molding was the go-to choice for durable prototype parts, especially in plastics. But with the rise of industrial 3D printing, designers and manufacturers now have powerful alternatives that significantly reduce upfront cost and lead time. The challenge, however, is understanding when each option makes financial sense.
Many teams mistakenly assume that 3D printing is always cheaper or that injection molding is only feasible for large-scale production. The truth is more nuanced. Each method has distinct cost structures, advantages, and break-even points and a wrong choice can inflate prototyping budgets by 40–60%.
This guide breaks down the real cost differences between injection molding and 3D printing so you can make an informed, ROI-driven decision for your next prototype.
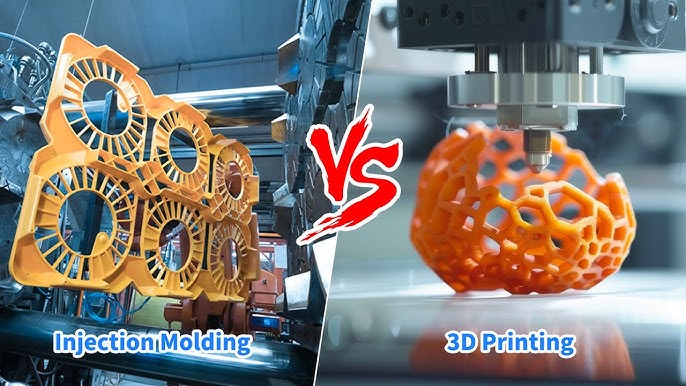
Injection Molding vs 3D Printing: A Clear Overview
Injection molding and 3D printing serve the same purpose — producing physical parts — but their cost models, workflows, and ideal use cases are completely different.
Injection Molding (Traditional Manufacturing)
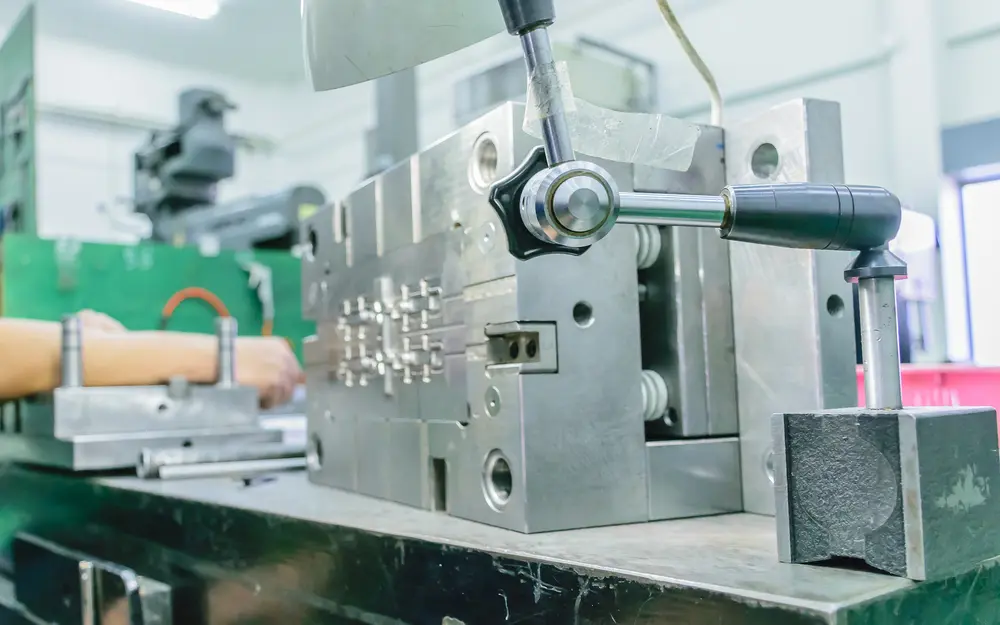
Injection molding uses a metal mold, heated plastic pellets, and high pressure to produce parts. It delivers exceptional strength, accuracy, and surface finish, making it ideal for production-grade prototypes.
But the catch is the tooling. Creating a mold requires specialized machining, careful design, and time, which means high upfront cost, even if you need just a few prototype parts.
3D Printing (Additive Manufacturing)
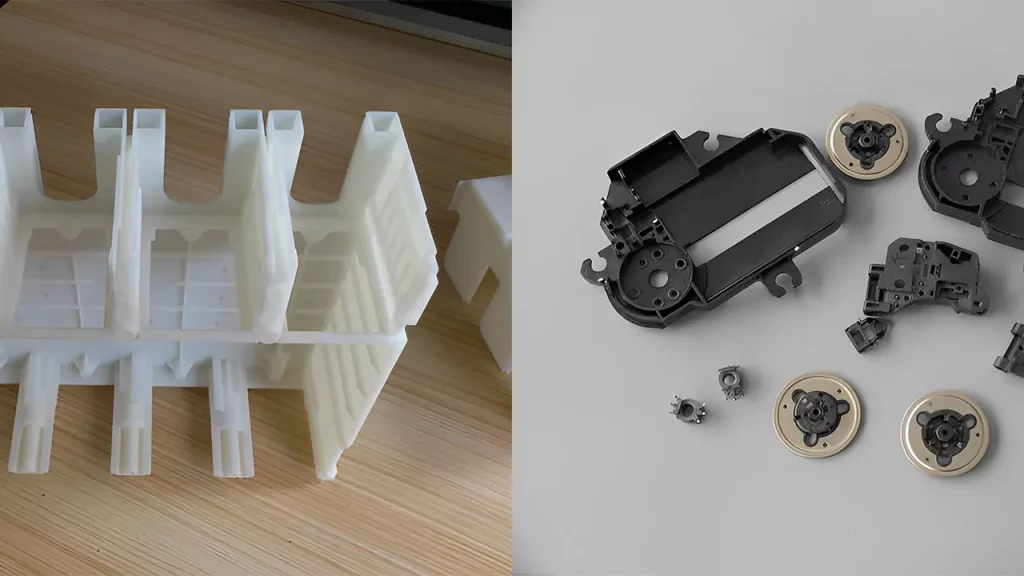
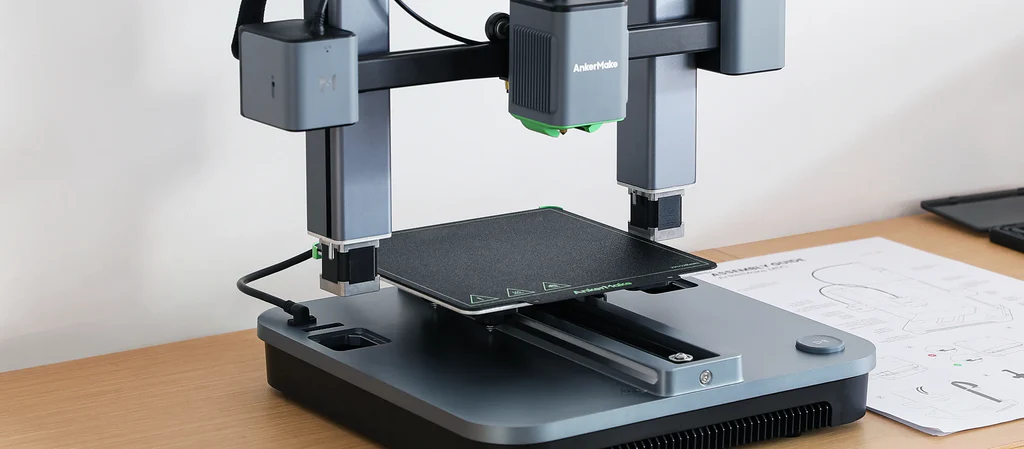
3D printing builds parts layer-by-layer, eliminating the need for molds. This means little to no setup cost, faster turnaround times, and the ability to revise designs instantly. For early-stage prototyping or small batches, it can be significantly more cost-effective.
However, printed parts often require post-processing and may not match the durability or precision of molded parts — especially for functional prototypes or testing under load.
The Core Difference in Cost Structure
- Injection molding = High upfront cost, low per-part cost
- 3D printing = Low upfront cost, medium per-part cost
This is why volume is the biggest determinant of cost.
For 1–200 units, 3D printing usually wins.
For 300+ units, injection molding generally becomes cheaper overall.
Key Cost Factors That Influence Both Methods
When comparing injection molding and 3D printing, the clearest way to understand the cost gap is to examine the mechanics behind each method. The two technologies differ not only in how parts are produced, but also in how money is spent across the entire prototyping journey. These cost factors shape the final decision far more than the part price alone.
Tooling and Setup Costs
The biggest cost difference appears right at the start. Injection molding requires a custom metal mold, which must be designed, machined, hardened, and polished. For even a small part, this mold can cost anywhere from ₹50,000 to several lakhs, depending on complexity. This makes injection molding an expensive choice for prototypes unless you plan to use the same mold for future production.
3D printing has no tooling at all. You load the CAD file, select your material, and print. This eliminates setup expenses and dramatically shortens the time between design and prototype. For projects that involve multiple design revisions, 3D printing offers clear economic advantages because each iteration costs almost nothing to restart.
Material Costs and Consumption
On paper, raw material prices may appear cheaper for injection molding — pellets often cost less per kilogram than 3D printing resins or filaments. But the picture changes when you consider wastage, runner systems, support structures, and machine compatibility.
Injection molding requires enough material to fill the mold cavity plus any runners, sprues, or gates. This wastage is unavoidable, and for prototypes with only a few units, the material savings don’t justify the mold investment.
In 3D printing, the material cost per kilogram is higher, but consumption is usually more precise. The printer uses only what the part requires, making it more cost-efficient for low-volume or one-off prototypes.
Production Volume and the Break-Even Effect
Volume is the defining factor in cost comparison. Injection molding becomes dramatically cheaper per part as the quantity increases because the high mold cost gets distributed across many units.
For example, a ₹90,000 mold spread over 1,000 parts adds only ₹90 to each part. Spread over 10 parts, it adds ₹9,000 per part.
3D printing doesn’t benefit from volume in the same way. The per-part cost stays roughly consistent whether you print one or fifty, which is why it’s ideal for early-stage testing or small batches but becomes expensive for larger runs.
Lead Time and Labor Costs
Injection molding involves multiple steps before the first part is made — mold design, CNC machining, trial runs, polishing, and adjustments. This can take 1 to 4 weeks, sometimes longer for complex parts. All these steps add to labor cost and delay the prototype timeline.
3D printing, on the other hand, offers near-instant production. Models can often be printed within hours, with only minimal manual intervention. For teams working on fast design cycles or tight launch schedules, time saved translates directly into cost saved.
Precision, Strength, and Finish Requirements
Another factor affecting cost is the level of engineering required. Injection-molded parts generally have superior mechanical properties and surface finish right out of the mold. If your prototype needs to be tested under stress, exposed to the environment, or used as a final-product sample for investors, molding may justify the cost despite the tooling.
3D-printed parts vary by technology. SLA gives smooth surfaces but is brittle, while FDM is affordable but shows layer lines. SLS and MJF offer good mechanical strength but may require post-processing. These post-processing steps, sanding, curing, machining — add labor cost that teams often forget to account for.
Design Iterations and Flexibility
No prototype is perfect on the first attempt. But each revision has a cost. With injection molding, any design change requires altering or rebuilding the mold, an expensive and time-consuming process.
3D printing allows you to iterate rapidly and cheaply. You can modify your CAD file and print a new version the same day. This flexibility makes 3D printing far more cost-effective in the exploratory phase of product design.
Detailed Cost Comparison Between Injection Molding and 3D Printing
Cost decisions around prototyping shouldn’t rely on assumptions — they should be based on clear numerical differences. Below is a simplified cost comparison that highlights how each method behaves at different stages of production.
|
Cost Factor |
Injection Molding |
3D Printing |
|
Initial Setup / Tooling |
Very High (₹50,000–₹2,00,000+) |
None |
|
Cost Per Part |
Very Low (₹20–₹80 after tooling) |
Moderate to High (₹100–₹300) |
|
Lead Time |
Slow (1–4 weeks) |
Fast (hours to days) |
|
Best Volume Range |
500 units and above |
1–200 units |
|
Complexity Handling |
Limited by mold machining |
Excellent for complex geometries |
|
Surface Finish |
Excellent |
Depends on technology; often needs post-processing |
When Injection Molding Becomes More Cost-Effective
Injection molding is often perceived as expensive because of the tooling investment. But that investment becomes cost-effective once you cross a certain volume threshold. The exact number varies depending on part size and material, but for most prototypes:
The break-even point is around 250–300 units.
Once the mold cost is absorbed, each additional part becomes incredibly cheap. If the project requires hundreds of units for field testing, pilot runs, or marketing samples, molding becomes significantly more economical.
There is also a quality advantage. Injection-molded prototypes match the strength, surface finish, and tolerances of production units. For teams looking to validate assembly, structural integrity, or mass-production fit, injection molding delivers long-term value because it brings prototypes closer to real-world performance.
Additionally, if you anticipate eventual mass production, investing in a mold early can accelerate your path from prototype to launch — reducing delays later when you scale up.
When 3D Printing Is the More Cost-Effective Choice
3D printing is unbeatable when the goal is to explore ideas, test early-stage concepts, or produce only a handful of parts. With no tooling cost, the upfront expenses are minimal. Even if the per-part cost is higher, the overall project remains far cheaper than molding at low volumes.
This makes 3D printing ideal for:
- Early R&D and design iterations
- Functional testing for 1–20 samples
- Complex parts that would be expensive to mold
- Quick turnaround prototypes for client demos
- Products that are still evolving and need multiple revisions
Furthermore, 3D printing greatly reduces risk. You don’t have to commit to a mold when the design isn’t final. You can test different geometries, change tolerances, adjust features, and print again — all within the same day and at a fraction of the cost.
In situations where customization, speed, or design flexibility matters more than unit cost, 3D printing is the superior economic option.
Real-World Cost Breakdown: Injection Molding vs 3D Printing
To understand the true cost difference, let’s look at a realistic scenario, a small ABS electronics enclosure used for prototyping.
Example Part
Dimensions: 100mm × 70mm × 40mm
Material: ABS
Complexity: Moderate
Quantity Needed: 50 units initially, 300 units later
Injection Molding Costs
- Mold creation: ₹80,000 – ₹1,20,000
- Per-part cost: ₹20–₹40
- Timeline: 2–3 weeks for tooling + sampling
Cost for 50 units:
- Tooling: ~₹1,00,000
- Parts: ~₹1,500
- Total: ~₹1,01,500
Cost for 300 units:
- Tooling: ~₹1,00,000
- Parts: ~₹9,000
- Total: ~₹1,09,000
Cost per part at 50 units ≈ ₹2,000
Cost per part at 300 units ≈ ₹363
3D Printing Costs
- No tooling cost
- Per-part cost: ₹150–₹300 (depends on material & technology)
- Timeline: Same day or next day
Cost for 50 units:
~₹7,500–₹15,000
Cost for 300 units:
~₹45,000–₹90,000
Cost per part stays roughly stable regardless of quantity.
The Break-Even
In this scenario, injection molding becomes cheaper somewhere between 250–300 units. Before that, 3D printing remains far more economical.
This demonstrates an important truth:
- 3D printing wins in early-stage prototyping.
- Injection molding wins when you scale.
Beyond Cost — What Else Should You Consider?
Cost is important, but not the only factor influencing your decision. Several practical elements can impact whether molding or printing makes more sense during prototyping.
Speed of Iteration
If your design is still evolving, injection molding is risky and expensive. Every revision requires modifying or remaking the mold. With 3D printing, you can redesign and reprint within hours — ideal for early design sprints and rapid prototyping cycles.
Mechanical Performance
Injection-molded parts perform more like final production units. They have better strength, consistency, and durability. If your prototype must endure stress testing, drop testing, or assembly trials, molding offers higher fidelity.
Surface Finish
Injection molding provides near-perfect finish and texture straight out of the mold.
3D printed parts often show layer lines or require sanding, curing, or coating — which adds labor time.
Complex Geometries
Some shapes are impossible to mold without expensive side-actions or inserts.
3D printing handles complexity effortlessly, making it ideal for organic shapes, hollow sections, or intricate internal features.
Scalability
If you plan to scale to production, molding pays off long-term.
If you’re testing an idea that might pivot dramatically, 3D printing provides flexibility.
How Manufyn Helps You Choose the Most Cost-Effective Prototyping Method
Choosing between injection molding and 3D printing isn’t just a cost decision — it’s a strategic one. Manufyn simplifies this entire evaluation process by giving engineering and manufacturing teams clear, data-driven insights into what method is best for their prototypes and long-term production plans.
✔ Complete Cost Simulation for Both Methods
Manufyn compares:
- Tooling cost
- Per-part cost
- Material expenses
- Lead time
- Revision cost
- Break-even volumes
This gives you an instant, accurate projection of total prototype cost — whether you choose printing, molding, or a hybrid approach.
✔ Digital Twin–Enabled Feasibility Checks
Before investing in molds, Manufyn uses digital simulations to test:
- Manufacturability
- Tolerances
- Stress behavior
- Injection flow paths
- Warpage risks
This prevents expensive mold mistakes and ensures the part is production-ready.
✔ Rapid Prototyping Support
Manufyn connects you with quick-turn 3D printing partners for:
- SLA, SLS, MJF, FDM
- Functional test parts
- Multiple iterations at low cost
This helps teams move faster during early R&D.
✔ Injection Molding Vendor Network
Once you’re ready for scale, Manufyn helps source:
- Mold makers
- Tool fabricators
- Injection molding suppliers
- Material specialists
You get competitive pricing, quality assurance, and faster turnaround.
✔ Break-Even and Production Planning Tools
Manufyn shows exactly when to shift from printing to molding — maximizing cost efficiency and reducing prototyping waste.
FAQs: Injection Molding vs 3D Printing for Prototypes
For small quantities, 3D printing is almost always cheaper because it has no tooling cost. You only pay for the material and machine time. Injection molding requires a custom steel or aluminum mold, which can cost tens of thousands of rupees even before the first part is produced. However, once volume increases, the cost-per-part drops dramatically for injection molding, making it cheaper for larger batches (usually above 250–300 units).
The break-even point varies based on part size, material, and complexity, but it typically falls between 200–300 units. Below this range, 3D printing is more cost-effective. Above it, the high tooling cost gets distributed across more units, making injection molding significantly cheaper per part.
Tooling for injection molding usually takes 1 to 4 weeks, depending on the complexity of the part and the type of mold required. The process includes design, CNC machining, polishing, test runs, and adjustments. For teams working under tight timelines or rapidly iterating designs, this added time often makes 3D printing a more practical choice for early prototypes.
Yes — depending on the technology. Processes like SLS, MJF, and industrial FDM can produce strong, functional parts suitable for mechanical testing, fit checks, and early validation. However, injection-molded parts typically offer superior strength, durability, and surface finish, making them more reliable for high-stress testing or customer-facing samples.
Absolutely. Most product teams begin with 3D printing for fast, affordable iterations and move to injection molding once the design stabilizes and production volumes increase. This phased approach saves time, reduces risk, and ensures the mold is made only after the design is completely validated.
For mass production — yes. Injection molding provides unmatched speed, consistency, and cost efficiency once the tooling is ready. But for customized products, complex geometries, or low-volume manufacturing, 3D printing can sometimes be the better long-term strategy.
Manufyn helps teams evaluate the exact cost difference between 3D printing and injection molding using simulations, cost projections, and digital feasibility checks. The platform identifies break-even points, finds the best manufacturing partners, and helps avoid expensive tooling mistakes. Whether you’re printing early revisions or preparing for full-scale molding, Manufyn ensures you choose the most cost-effective path for every stage.
Ready to Choose the Right Prototyping Method?
Whether you’re building your first concept model or preparing for pre-production runs, Manufyn gives you clarity, cost visibility, and end-to-end support through the entire prototyping journey.
Get a Free Prototype Cost Analysis with Manufyn
See how much you can save by choosing the right method at the right stage.