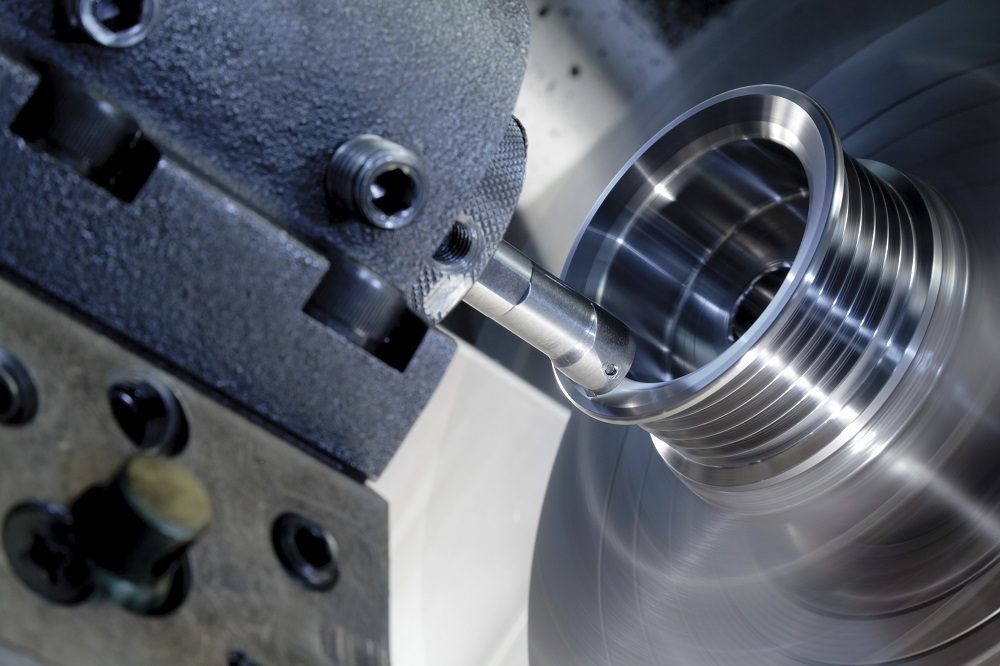
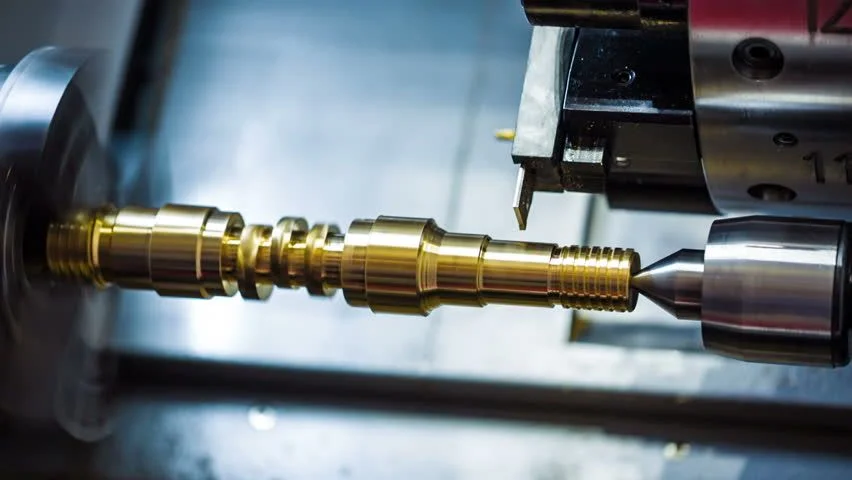
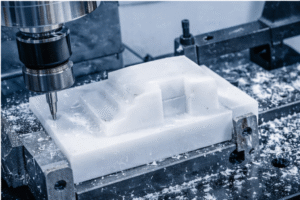
Manufyn reviews hole and thread design for machinability.
Threaded holes are among the most common—and most failure-prone—features in CNC machining. Small design decisions around hole type, depth, and threading method can significantly affect machining cost, tool life, and part reliability. This guide focuses strictly on practical hole and thread design decisions that impact manufacturability, accuracy, and lead time.
Written for product designers, mechanical engineers, and sourcing teams, this resource explains how to design holes for threading, choose the right threading method, and avoid common CNC-related issues. The goal is simple: help you design hole and thread features that machine correctly the first time.
Why Hole & Thread Design Matters in CNC Machining
Hole and thread features appear simple in CAD, however they introduce some of the highest machining risks in real production. A poorly designed threaded hole can cause tap breakage, inconsistent thread quality, excessive cycle time, or part scrap. As a result, hole and thread design has a direct impact on cost, quality, and delivery timelines.
Unlike external features, holes restrict tool access and chip evacuation. Blind holes increase heat and tool stress, while incorrect hole sizing for threading leads to weak or unusable threads. In addition, over-specifying thread depth or tolerances often adds machining time without improving function. Therefore, understanding how CNC machines actually create holes and threads is essential for manufacturable design.
From a CNC perspective, holes are not just geometric features—they are machining operations involving drilling, interpolation, tapping, or thread milling. Each choice affects tooling, cycle time, and failure risk. Designing holes and threads with these realities in mind ensures predictable machining outcomes and reduces DFM revisions.
Not sure whether a through or blind hole is right for your part?
Through Holes vs Blind Holes — What Actually Changes in Machining
The first critical decision in hole design is whether a hole should be through or blind. Although this choice may seem minor, it significantly changes how the hole is machined and threaded.
Through holes are generally easier and more reliable to machine. Chips evacuate freely, cutting tools experience less heat buildup, and tapping operations are more stable. Because the tool exits the part, depth control is less critical, which lowers the risk of tool breakage and improves consistency. Whenever function allows, through holes are the most CNC-friendly option.
Blind holes, on the other hand, require precise depth control and careful toolpath planning. Chips accumulate at the bottom of the hole, increasing heat and cutting forces. When blind holes are used as a hole for threading, the risk increases further due to limited tap relief and reduced chip evacuation. As a result, blind threaded holes often require slower machining speeds, additional clearance at the bottom, or alternative threading methods.
From a design standpoint, blind holes should only be used when required for functional or assembly reasons. If a blind hole must be threaded, designers should account for extra depth beyond the usable thread length and avoid specifying unnecessary thread engagement. Making this decision early reduces machining complexity and improves thread quality.
Designing Holes for Threading
Designing a hole for threading requires more precision than designing a standard drilled hole. In CNC machining, the quality of a threaded hole depends heavily on how accurately the hole is prepared before threads are formed. Therefore, hole size, straightness, depth, and chip evacuation must be considered early in the design stage.
Pilot Hole Size and Its Impact on Thread Quality
The pilot hole diameter determines how much material remains for thread formation. If the hole is undersized, the tap or thread mill must remove excessive material, which increases cutting force and significantly raises the risk of tool breakage. However, if the hole is oversized, thread engagement is reduced, resulting in weak or incomplete threads. As a result, selecting the correct hole size for threading is one of the most critical design decisions for threaded features.
Hole Accuracy Before Threading
In CNC machining, threads inherit the geometry of the hole beneath them. A hole that is not straight or round will produce inconsistent threads, regardless of how well the threading operation is executed. While drilling is fast and commonly used, it offers limited control over roundness and positional accuracy. For tighter requirements, interpolated or bored holes provide better consistency and improve overall thread quality.
Depth Allowance for Threading Operations
Threaded holes—especially blind ones—require additional depth beyond the usable thread length. This extra space allows chips to accumulate and prevents the tap or thread mill from bottoming out. Without sufficient depth allowance, tooling stress increases rapidly, leading to broken taps or damaged threads. Consequently, blind holes used for threading should always be designed deeper than the specified thread depth.
Chip Evacuation Considerations
Chip evacuation becomes increasingly difficult as hole depth increases. In a hole for threading, trapped chips raise temperature and cutting forces, which directly affect tool life and thread integrity. Therefore, deeper threaded holes often require slower cutting speeds, additional clearance, or alternative threading methods to maintain reliability.
Threaded Holes Explained (CNC Reality vs CAD Intent)
A threaded hole defined in CAD represents design intent, not manufacturing reality. In CNC machining, creating a thread hole involves multiple controlled operations that must align with tooling capability, material behavior, and depth constraints. Understanding this distinction helps designers avoid assumptions that lead to machining issues.
What a Threaded Hole Means in CNC Machining
From a manufacturing perspective, a threaded hole is not a single feature but a sequence of operations. First, a hole is created to the correct size and depth. Then, threads are formed using tapping or thread milling. If either step is poorly defined, the final threaded hole may fail to meet functional requirements. Therefore, designers must specify threaded holes with manufacturing constraints in mind, not just nominal dimensions.
Functional vs Non-Functional Threaded Holes
Not all threaded holes serve the same purpose. Functional threaded holes—such as those used for fasteners, load transfer, or alignment—require proper thread engagement and consistent quality. In contrast, non-functional threads used for temporary fixturing or assembly aids do not require the same level of precision. Over-specifying both types equally increases machining time and cost without improving performance.
How Machinists Interpret Thread Callouts
Thread callouts guide machinists on how to produce the thread hole. In addition to thread size and pitch, callouts should clearly indicate whether the hole is through or blind and how much thread depth is required. When these details are missing or unclear, machinists must make assumptions, which increases the risk of incorrect hole tapping or insufficient thread engagement.
Why Threaded Holes Are Flagged During DFM
Threaded holes are frequently flagged during DFM reviews because they combine multiple risk factors: restricted tool access, chip evacuation challenges, and tight depth control. Even small design oversights—such as insufficient depth or incorrect hole size—can cause failures during machining. As a result, clear and realistic threaded hole design significantly reduces revisions and production delays.
How Threads Are Created in CNC Machining
Threads in CNC machining are not created in a single universal way. The method used to form a threaded hole depends on material, hole depth, tolerance expectations, and production volume. Therefore, understanding how threads are manufactured helps designers choose the right approach and avoid unnecessary machining risk.
Tapped Holes
Tapping is the most common and fastest method for creating internal threads. A tap cuts the thread profile directly into the hole after the pilot hole is prepared. Because the entire thread form is created in one operation, tapping is highly efficient for standard thread sizes and shallow depths.
However, tapping introduces higher risk in blind holes and harder materials. Chips must move upward or compress at the bottom of the hole, which increases torque and tool stress. As a result, tapped holes are more prone to tool breakage if the hole depth is insufficient or the pilot hole is undersized. Tapping works best in through holes, softer materials, and applications where thread depth is moderate.
Thread Milling
Thread milling forms threads using a circular interpolation toolpath rather than a single plunge operation. Instead of cutting the full thread profile at once, the thread mill gradually creates the thread along the hole wall. This approach significantly reduces cutting forces and improves depth control.
Because thread milling does not rely on chip compression, it is more reliable in blind holes and harder materials such as stainless steel. In addition, one thread mill can often be used for multiple thread diameters of the same pitch. Consequently, thread milling is preferred when precision, flexibility, or reduced failure risk is required, even though it has a longer cycle time than tapping.
Form Tapping (Thread Forming)
Form tapping creates threads by plastically deforming the material rather than cutting it. This method produces stronger threads because the grain structure is compressed instead of removed. However, form tapping requires ductile materials and precise hole sizing.
In CNC machining, form tapping is commonly used in aluminum and mild steel. It is not suitable for brittle materials or holes with poor diameter control. Therefore, form tapping should only be specified when material properties and hole accuracy are well understood.
Get expert recommendations on tapping vs thread milling for your design.
Thread Depth & Engagement — Avoiding Overdesign
Thread depth and engagement are frequently over-specified in CAD models. While deeper threads may appear stronger, they often add machining time without providing meaningful functional benefit. Understanding realistic engagement requirements helps designers reduce cost and improve manufacturability.
Recommended Thread Engagement Guidelines
For most CNC-machined parts, full thread strength is achieved with limited engagement. In general, an engagement length of 1× the nominal thread diameter is sufficient for steel and stainless steel. For softer materials such as aluminum, 1.5× the diameter is typically recommended to prevent thread stripping.
Increasing engagement beyond these values rarely improves performance. Instead, it increases tool wear, machining time, and the risk of tap failure. Therefore, designers should specify only the engagement required for the intended load.
Thread Depth vs Total Hole Depth
In blind threaded holes, the total hole depth must exceed the usable thread depth. This additional depth provides space for tool runout and chip accumulation. If the hole depth matches the thread depth exactly, taps can bottom out before completing the thread, causing breakage or incomplete threads.
As a best practice, designers should include extra depth beyond the required thread engagement. This allowance improves reliability and reduces the need for conservative machining parameters that increase cycle time.
When Deeper Threads Become a Problem
Excessive thread depth increases cutting torque and heat, especially in smaller diameter holes. In hard materials, this leads to accelerated tool wear or catastrophic failure. In softer materials, it increases the likelihood of material tearing or poor thread form. Consequently, deeper threads should only be specified when structural requirements clearly justify them.
Avoid over-specifying thread depth and increasing machining cost. Contact Manufyn today!
Material-Based Thread Design Decisions
Material choice plays a critical role in how threads behave during machining and in service. Different materials respond differently to cutting forces, heat, and deformation. Therefore, thread design must account for material-specific risks such as stripping, galling, or poor thread form.
Thread Design in Aluminum
Aluminum is easy to machine, however it has relatively low shear strength. As a result, threaded holes in aluminum are more susceptible to stripping under load. To compensate, designers often specify increased thread engagement or use thread inserts when higher strength is required.
Tapping and thread milling both work well in aluminum, provided the hole size is accurate. However, aggressive tapping in blind holes can still lead to chip packing. Consequently, for deeper blind threaded holes, thread milling is often the safer option.
Thread Design in Steel and Stainless Steel
Steel and stainless steel offer higher thread strength, but they introduce increased cutting forces. In stainless steel, work hardening is a common issue if chip load is too low. Therefore, maintaining proper feed rates is essential to avoid damaged threads.
Tapping is suitable for through holes and shallow blind holes in steel. However, for deeper holes or harder grades, thread milling provides better depth control and reduces the risk of tool breakage. In addition, thread milling allows easier adjustment of thread depth without changing tools.
Thread Design in Plastics
Plastics deform more easily than metals, which affects thread quality and retention. Threads cut directly into plastic can loosen over time, especially under repeated assembly. As a result, designers often limit thread depth and avoid fine pitches in plastic components.
For higher strength or repeated use, thread inserts are recommended. When direct threading is required, sharp tools and controlled cutting parameters help reduce tearing and melting.
When Thread Inserts Make Sense
Thread inserts add cost and assembly steps, however they significantly improve durability in soft or brittle materials. Inserts are commonly used in aluminum, plastics, and magnesium when threads are subjected to repeated assembly or high loads. Therefore, inserts should be specified based on functional requirements rather than used by default.
Tolerances & Inspection Reality for Threaded Holes
Thread tolerances directly affect machining time, inspection effort, and cost. However, not all threaded holes require tight tolerances. Understanding how threads are inspected in CNC machining helps designers apply precision only where it adds value.
When Thread Tolerances Matter
Tight thread tolerances are typically required for pressure-sealing applications, precision assemblies, or parts that rely on controlled preload. In these cases, thread form and pitch diameter must be carefully controlled to ensure proper function.
For most standard fastener applications, default thread classes provide sufficient performance. Over-specifying tolerances in these situations increases machining time without improving reliability.
How Threaded Holes Are Inspected
In CNC machining, internal threads are commonly inspected using go/no-go gauges rather than direct measurement. These gauges verify that the thread meets functional requirements, not that it matches a theoretical profile exactly. Therefore, extremely tight tolerance callouts may not translate into meaningful inspection outcomes.
Cost Impact of Over-Tolerancing Threads
Specifying tight tolerances on all threaded holes forces conservative machining parameters and additional inspection steps. This increases cycle time and cost, especially in production runs. Consequently, designers should reserve tight tolerances only for threaded holes that are critical to function.
Common Hole & Thread Design Mistakes
Many CNC machining issues related to holes and threads originate at the design stage. Although these features may appear straightforward in CAD, small oversights can lead to tool failure, poor thread quality, or unnecessary cost. Understanding these common mistakes helps prevent avoidable DFM revisions and production delays.
Undersized Holes for Threading
One of the most frequent errors is specifying a hole diameter that is too small for threading. When the pilot hole is undersized, the tap or thread mill must remove excessive material, which increases cutting forces and torque. As a result, tool breakage and inconsistent thread form become more likely, especially in blind holes and harder materials.
Excessive Thread Depth
Designers often specify deeper threads than required, assuming more engagement equals higher strength. However, beyond a certain point, additional thread depth does not improve performance. Instead, it increases machining time, tool wear, and failure risk. Therefore, thread depth should be limited to what is functionally necessary.
No Clearance at the Bottom of Blind Holes
Blind threaded holes require additional depth beyond the usable thread length. When this clearance is missing, taps can bottom out before completing the thread. This leads to broken tools, incomplete threads, or damaged parts. Providing sufficient relief at the bottom of blind holes significantly improves machining reliability.
Threads Placed Too Close to Edges
Threads located near part edges or thin walls weaken the surrounding material and increase the risk of distortion or cracking. In addition, limited wall thickness reduces thread strength and can cause deformation during tapping. Consequently, designers should maintain adequate edge distance around threaded holes.
Over-Tolerancing All Threaded Features
Applying tight tolerances to every threaded hole increases cost without adding functional value. Most standard fastener threads perform well with default tolerance classes. Over-tolerancing forces conservative machining and inspection practices, which lengthen cycle time and raise production cost.
Best-Practice Checklist for Hole & Thread Design
Well-designed hole and thread features balance functionality with manufacturability. Before releasing a design for CNC machining, engineers should confirm that each threaded feature follows practical design guidelines.
Designing Holes for Machining Success
Hole types should be chosen based on machining simplicity whenever possible. Through holes are generally preferred over blind holes due to better chip evacuation and lower tooling stress. When blind holes are necessary, additional depth should be included to support threading operations.
Preparing Holes for Threading
Hole size must be appropriate for the selected threading method. Designers should ensure that holes intended for threading are straight, round, and accurately sized. For deeper or higher-precision threaded holes, interpolated or bored holes often produce more consistent results than drilling alone.
Choosing the Right Threading Method
Tapped holes are fast and cost-effective for standard applications, while thread milling offers better control in blind holes, hard materials, or variable thread depths. Form tapping should only be specified when material ductility and hole accuracy are well understood.
Specifying Thread Depth and Engagement
Thread engagement should match functional requirements rather than defaulting to maximum depth. In most cases, limited engagement provides full strength while reducing machining risk. Extra depth should be added only to accommodate tool runout and chip clearance.
Applying Tolerances Thoughtfully
Thread tolerances should be specified only when required by function. Standard tolerance classes are sufficient for most fastener applications. Reserving tight tolerances for critical threads helps control cost and lead time.
Frequently Asked Questions
What is the correct hole size for a threaded hole?
The correct hole size for a threaded hole depends on the thread size, pitch, and threading method. For tapped holes, the pilot hole must leave enough material for proper thread formation without overloading the tap. Using the recommended tap drill size ensures good thread engagement and reduces tool breakage risk.
How deep should a hole for threading be?
The total hole depth should always be greater than the usable thread depth. Additional depth is required to allow for tool runout and chip accumulation, especially in blind holes. Without this allowance, taps may bottom out, leading to damaged threads or broken tools.
When should I use thread milling instead of tapping?
Thread milling is preferred for blind holes, hard materials, or applications requiring precise depth control. It also reduces the risk of tool breakage and allows one tool to produce multiple thread diameters of the same pitch. Although slower than tapping, it offers greater reliability in challenging conditions.
How much thread engagement is actually required?
In most cases, full thread strength is achieved with limited engagement. Approximately one times the nominal diameter is sufficient for steel, while softer materials such as aluminum may require slightly more engagement. Specifying deeper threads rarely improves strength and often increases machining cost.
How does material choice affect threaded hole design?
Material properties influence thread strength, tool wear, and failure risk. Softer materials are more prone to stripping, while harder materials increase cutting forces and heat. As a result, threading method, engagement length, and the use of inserts should be adjusted based on the material.
Do threaded holes need tight tolerances?
Most threaded holes used for standard fasteners do not require tight tolerances. They are commonly inspected using go/no-go gauges to confirm functional fit. Tight tolerances should only be specified for critical applications where preload, sealing, or precision alignment is required.
Design holes and threads that machine right the first time.
Upload your CAD file to Manufyn for a fast DFM review, expert feedback on threaded holes, and a production-ready CNC machining quote.
