Manufyn helps match cutting tools to part geometry.
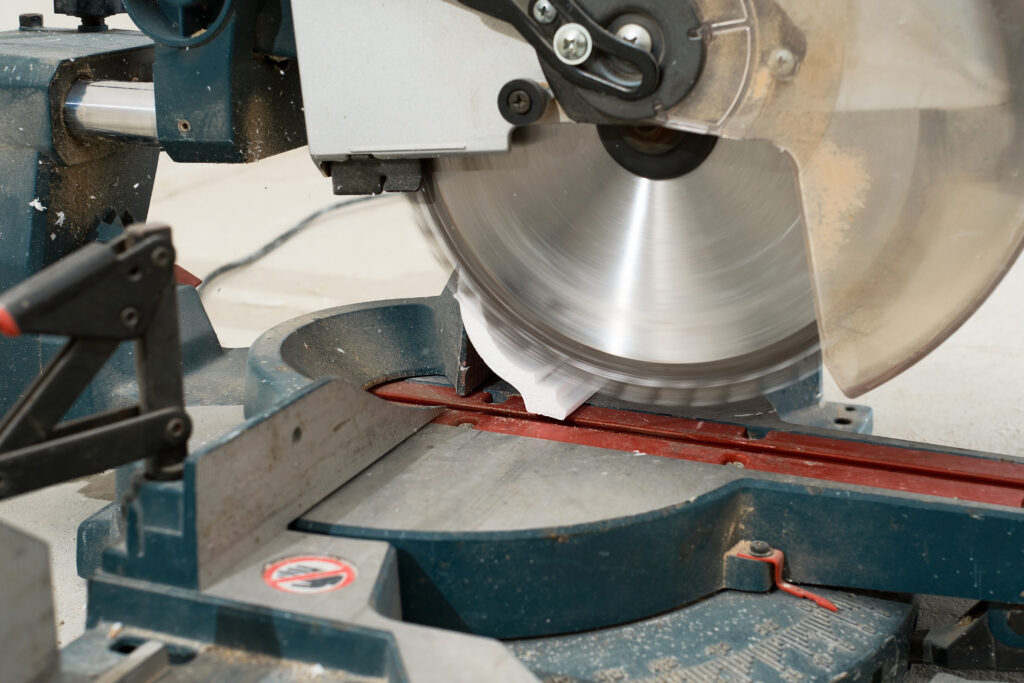
CNC cutting tools are the foundation of every machined component. They determine how efficiently material is removed, how accurately features are produced, and how consistent the final dimensional and surface quality will be. Because every tool behaves differently based on geometry, coating, and application, proper tool selection is essential to maintaining machining performance across prototypes and production.
In CNC machining, cutting tools directly affect cost, tool life, cycle time, and achievable tolerances. A well-chosen cutting tool delivers stable material removal, predictable wear, and clean surface finishes.
Conversely, choosing the wrong tool increases cycle time, causes premature tool failure, and creates dimensional instability. This guide provides an engineering-focused overview of CNC cutting tools, their types, geometry, selection criteria, and best practices for reliable machining performance.
Types of CNC Machining Tools
CNC machining tools fall into several specialized categories, each optimized for a different cutting action, material behavior, and feature geometry. Selecting the correct tool family is the first step toward achieving reliable machining performance, stable tolerances, and predictable surface finish.
Below is a comprehensive overview of the core tooling groups used in CNC milling and turning.
1. End Mills (Primary CNC Milling Tools)
End mills remove material using their cutting edges along the side and at the tool tip.
Common Types:
- Flat end mills → profiles, pockets, shoulders
- Ball nose end mills → 3D contouring, smooth surfaces
- Corner radius mills → stronger edges for steels
- Roughing end mills → fast material removal
- High-helix mills → excellent chip flow in aluminum
Used for: contouring, slotting, pocketing, finishing.
2. Drills (Hole-Making Tools)
Drills create circular holes and serve as the base for most hole-finishing operations.
Types:
- Twist drills → general metals
- Carbide drills → hardened steels, stainless
- Parabolic drills → deep holes
- Spot drills → prevent drill wandering
Used for: through holes, blind holes, pre-ream or pre-thread holes.
3. Reamers (Precision Hole Tools)
Reamers refine pre-drilled holes to achieve tight size and high surface quality.
Capabilities:
- Very tight hole tolerances (H7 or better)
- Smooth internal finish (Ra < 0.8 µm)
- Superior roundness and concentricity
Ideal for pins, bushings, shafts, dowel fits.
4. Taps & Thread Mills (Threading Tools)
Taps
Cut threads quickly but are more prone to breakage in tough materials.
Thread Mills
Use helical interpolation to form threads.
Benefits include:
- Lower breakage risk
- Ability to cut multiple diameters
- Better accuracy in stainless, titanium
Preferred for precision threads and difficult materials.
5. Boring Tools
Boring bars enlarge or refine holes with high accuracy.
Advantages:
- Excellent diameter control
- High-quality surface finish
- Ideal for bearing bores and alignment-critical features
6. Turning Inserts (Lathe Tools)
Turning inserts are replaceable carbide tools used for OD, ID, facing, grooving, and threading.
Insert Variations:
- Roughing, finishing, profiling
- Left-hand, right-hand, neutral
- Different chipbreakers for steel, aluminum, stainless
Widely used for lathe operations due to predictable wear and fast changeover.
7. Face Mills & Shell Mills
These tools machine large flat surfaces efficiently.
Capabilities:
- High material removal rates
- Excellent for stock removal and surfacing
- Insert-based → cost-effective for frequent use
8. Chamfer, Deburr & Engraving Tools
Tools used for edge refinement and mark creation.
- Chamfer mills → edges, countersinks
- Deburring tools → remove sharp edges
- Engraving tools → part IDs, serial numbers
9. Specialty Tools
For advanced machining tasks or specific industries.
Examples:
- Lollipop/undercut cutters → 5-axis undercuts
- Thread whirling cutters → medical screws
- Diamond-coated tools → composites, graphite
- Form tools → repeatable profile machining
Need guidance on choosing the right CNC machining tools for your part?
CNC Tooling Fundamentals
Effective CNC tooling requires more than selecting the right cutter. Tool holding, rigidity, and chip management all influence machining accuracy, surface finish, and tool life. Understanding these fundamentals helps engineers design parts that are easier to manufacture and choose machining strategies that reduce variation.
1. Tool Holders and Collets
Tool holders (ER collets, shrink-fit holders, hydraulic holders) determine how rigidly a tool is secured.
- Shrink-fit and hydraulic holders offer the highest stability and minimal runout.
- ER collets are versatile but introduce slightly higher runout.
Lower runout improves tool life and produces more accurate dimensions, especially in small-diameter tools.
2. Tool Stickout (Length)
Tool stickout—the distance from the holder to the tool tip—strongly affects deflection and vibration.
- Shorter stickout → better surface finish, less chatter.
- Longer stickout → necessary for deep pockets but reduces stability.
As a result, machine shops minimize stickout whenever possible.
3. Tool Rigidity and Machine Stability
Tool rigidity depends on tool material (carbide vs HSS), length, and holder design.
- Carbide tools are stiffer and support higher-speed machining.
- HSS tools are more flexible and best for less rigid setups.
Machine rigidity further affects how aggressively a tool can cut without vibration.
4. Coolant Delivery and Chip Evacuation
Proper coolant flow manages heat, lubricates the cut, and clears chips.
- Poor chip removal → recutting, surface damage, excessive tool wear.
- High-pressure coolant (HPC) → essential for deep drilling or stainless steel.
Consequently, coolant strategy is a key part of tooling performance.
5. Spindle Speed, Feed Rate, and Chip Load
Tooling performance depends on running the correct chip load per tooth.
Undershooting chip load causes rubbing and premature wear; overshooting causes breakage.
Correct SFM (surface feet per minute) and feed-per-tooth maximize both efficiency and tool life.
CNC Cutting Tool Geometry & Terminology
CNC cutting tool geometry determines how efficiently a tool shears material, manages heat, and evacuates chips. Therefore, understanding key geometry terms helps engineers and machinists select the right tool for each feature and material.
1. Flute Count
Flutes control chip evacuation and cutting strength.
- 2–3 flutes → best for aluminum and plastics (larger chip space).
- 4–6 flutes → best for steels and hard alloys (more cutting edges).
Higher flute count increases tool rigidity but reduces chip evacuation capacity.
2. Helix Angle
Helix angle affects chip flow and cutting forces.
- High helix (40–45°) → excellent for aluminum, smooth cutting.
- Medium helix (35°) → general metals.
- Low helix (<30°) → hardened steels, reduces lifting forces.
In addition, helix angle influences surface finish and vibration.
3. End Profiles
End mill tips come in multiple profiles:
- Flat End → sharp corners, pocketing, precision edges
- Ball Nose → 3D surfaces, contoured geometry
- Corner Radius → stronger edges, longer life in steel
Correct profile selection improves edge stability and surface quality.
4. Relief Angles
Relief angles allow clearance between the tool and the workpiece.
Too little relief causes rubbing; too much weakens the cutting edge.
Optimized relief ensures efficient cutting with minimal heat buildup.
5. Tool Coatings
Tool coatings enhance wear resistance and thermal performance.
- TiN → general-purpose, reduces friction
- TiAlN / AlTiN → excellent for steel, high heat resistance
- DLC (Diamond-Like Carbon) → ideal for aluminum and plastics
- CVD diamond → composites, graphite
As a result, coating selection strongly affects tool life, especially in high-speed machining.
Upload your CAD and get a tooling-ready machining plan within 24 hours.
CNC Milling Cutting Tools
CNC milling cutting tools determine the efficiency, accuracy, and stability of the machining process. Although many tools appear similar, their geometry, cutting mechanics, and chip formation behavior vary significantly, influencing tool life, surface finish, and cycle time.
The following section provides a practical engineering breakdown of each major milling tool type, with clear selection guidance for designers and machinists.
1. Flat End Mills
Flat end mills are the primary tools for 2D and 2.5D milling. Their sharp edges allow accurate pocketing and profiling.
Use When:
- Sharp internal corners are required
- Flat floors or steps must be produced
- General-purpose material removal is the goal
Avoid When:
- Machining deep 3D contours
- High tool engagement causes deflection (especially in long-stickout setups)
Performance Notes:
- Produces medium to fine surface finish
- Corner wear increases rapidly in stainless steel
- Benefits significantly from corner radius variants in harder materials
2. Ball Nose End Mills
Ball nose cutters maintain contact in 3D surfaces, producing consistent scallops and smoother contours.
Use When:
- Machining molds, dies, or organic shapes
- 3D surfacing where step-over consistency matters
- Avoiding flat spots on curved surfaces
Avoid When:
- Sharp geometry or flat steps are needed
- High feed is required (ball tips are slower due to small contact area)
Performance Notes:
- Excellent finishing capability
- Requires small step-over for smooth surfaces
- More prone to rubbing if chip load is too low
3. Corner Radius End Mills
These tools combine a flat profile with reinforced edges, reducing stress concentration and improving tool strength.
Use When:
- Machining steels, stainless steels, or alloy steels
- Surface finish and edge life are critical
- The design allows internal corner radii
Avoid When:
- Exact sharp corners are mandatory
- Very tight pockets restrict radius clearance
Performance Notes:
- Longer tool life in hard materials
- Reduces chatter in heavy roughing and finishing
- Minimizes micro-chipping at corners
4. Roughing End Mills (Corncob or Serrated Cutters)
Roughing mills remove large volumes of material quickly using serrated flute geometry.
Use When:
- High material removal rate (MRR) is the priority
- Machining thick blocks or heavy stock
- Reducing heat buildup in steels
Avoid When:
- Surface finish must be near-net
- Cutting thin-walled or delicate parts
Performance Notes:
- Produces rough surfaces (requires finishing pass)
- Excellent chip breaking in tough materials
- Lowers cutting forces, reducing spindle load
5. High-Helix End Mills
High-helix tools create strong upward chip evacuation, reducing heat and improving surface finish.
Use When:
- Machining aluminum, brass, and plastics
- High-speed machining (HSM) strategies
- Achieving clean, burr-free edges
Avoid When:
- Working on thin parts that may lift or vibrate
- Cutting sticky materials like pure copper (requires control)
Performance Notes:
- Superior finish in non-ferrous metals
- Reduces chip packing
- Requires rigid fixturing due to increased upward pull
6. Chamfer Mills
Used for edge refinement, chamfering, countersinks, and transition cleanup.
Use When:
- Creating chamfers on part edges
- Removing burrs
- Preparing holes for screws or fasteners
Performance Notes:
- Improves part handling and assembly
- Reduces burr formation on internal/external edges
7. Lollipop/Undercut Cutters
These tools access recessed or reverse-facing geometries that standard end mills cannot reach.
Use When:
- Undercuts in 5-axis machining
- Hidden faces or mold release features
- Machining slots with obstructed access
Performance Notes:
- Requires 4- or 5-axis capability
- Slower cutting due to small contact area
High-Value Engineering Table — Milling Tool Comparison
| Tool Type | Best Use Case | Avoid When | Finish Quality | Material Fit | Notes |
|---|---|---|---|---|---|
| Flat End Mill | Pocketing, profiles | Deep 3D contours | Medium – Fine | All | Produces sharp internal corners |
| Ball Nose End Mill | 3D surfacing | Flat floors | Fine – Excellent | Aluminum, Steel | Requires small step-over for smooth finish |
| Corner Radius End Mill | Steels, heavy finishing | Sharp inside corners | Fine | Steel, Stainless Steel | Stronger cutting edges, longer tool life |
| Roughing Mill | Fast stock removal | Finishing passes | Rough | Steel, Stainless Steel | Chip segmentation reduces cutting load |
| High-Helix End Mill | Aluminum, plastics | Thin unsupported walls | Excellent | Aluminum, Brass | High chip evacuation, smooth cutting action |
Get expert guidance on choosing the right CNC cutting tools for your part.
CNC Tool Selection by Material
Material properties directly determine how cutting forces, heat, chip formation, and tool wear develop during machining. Therefore, selecting the correct tool geometry, flute count, helix angle, and coating is essential for stable, predictable CNC performance.
Below is a material-by-material guide with corrected heading structure.
1. Aluminum & Non-Ferrous Materials
Material Behavior
- Low hardness and excellent machinability
- High thermal conductivity (heat leaves chips quickly)
- Prone to built-up edge (BUE)
- Requires maximum chip evacuation
Tooling Requirements
- Flute Count: 2–3 flutes for chip space
- Helix Angle: 40–45° for aggressive chip evacuation
- Geometry: Razor-sharp cutting edges, polished flutes
- Coatings: DLC, ZrN, TiB2 (anti-stick, anti-weld)
Optimized Cutting Behavior
- High RPM with properly matched feed
- Large step-overs for roughing
- Maintain consistent chip load to prevent rubbing
Common Failures & Fixes
| Failure | Cause | Fix |
|---|---|---|
| Built-up edge | Too many flutes, dull cutting edge, low helix angle causing chip adhesion | Switch to 2–3 flute tools, apply DLC or ZrN coating, increase surface speed |
| Poor surface finish | Chip recutting due to poor evacuation or incorrect feed strategy | Improve chip evacuation, increase helix angle, adjust feed and RPM |
| Tool breakage | Excessive tool deflection from long stickout or undersized tool | Shorten tool stickout, increase tool diameter, reduce depth of cut |
2. Mild Steel & Alloy Steel
Material Behavior
- Medium hardness
- Higher cutting forces
- Moderate heat generation
- Requires strong, balanced edge geometry
Tooling Requirements
- Flute Count: 4 flutes
- Helix Angle: 30–35°
- Geometry: Strong edges, small edge prep
- Coatings: TiAlN, AlCrN for heat resistance
Optimized Cutting Behavior
- Moderate spindle speeds
- Consistent coolant delivery
- Roughing → finishing tool strategy
Common Failures & Fixes
| Failure | Cause | Fix |
|---|---|---|
| Chatter in pockets | Tool deflection | Increase rigidity, use corner radius tools |
| Burn marks | Rubbing | Increase chip load, reduce speed |
| Excess wear | Wrong coating | Move to TiAlN or AlCrN |
3. Stainless Steel (304, 316)
Material Behavior
- High toughness
- Low thermal conductivity
- Work-hardens rapidly
- Heat stays at cutting edge
Tooling Requirements
- Flute Count: 4–6
- Helix Angle: 30–38°
- Geometry: Variable helix, reinforced cutting edges
- Coatings: TiAlN, AlTiN
- Coolant: HPC recommended
Optimized Cutting Behavior
- Maintain real chip load (avoid rubbing)
- Lower speed + higher feed per tooth
- Reduce radial engagement (step-over)
Common Failures & Fixes
| Failure | Cause | Fix |
|---|---|---|
| Work hardening | Low feed | Increase chip load |
| Tool chipping | Thermal shock | Keep coolant consistent |
| Blue chips | Excess heat | Lower SFM |
4. Titanium & High-Temperature Alloys (Ti-6Al-4V, Inconel)
Material Behavior
- Poor thermal conductivity
- Extremely high cutting load
- High chemical reactivity
- Prone to notch wear
Tooling Requirements
- Flute Count: 4–5
- Helix Angle: Low (≤30°) to reduce pull forces
- Geometry: Strong edges, micro-honed cutting edge
- Coatings: AlTiN, TiAlN, nano-composite
- Coolant: High-pressure, through-spindle
Optimized Cutting Behavior
- Slow speed, high feed (prevents rubbing)
- Shallow axial step-downs
- Adaptive/trochoidal toolpaths
Common Failures & Fixes
| Failure | Cause | Fix |
|---|---|---|
| Tip notching | Heat concentration | Reduce DOC, use corner radius |
| Breakage | Deflection | Use stub-length tool |
| Rough finish | Chip welding | Increase coolant pressure |
5. Plastics (ABS, POM, Nylon, Acrylic)
Material Behavior
- Soft and flexible
- Sensitive to heat and friction
- Tendency to melt or fuzz
Tooling Requirements
- Flute Count: 1–2
- Helix Angle: High helix
- Geometry: Sharp, polished cutting edges
- Coating: Uncoated (sharpest possible rake)
Optimized Cutting Behavior
- Moderate speed (avoid melting)
- Sharp tools only
- Air blast instead of coolant for some plastics
Common Failures & Fixes
| Failure | Cause | Fix |
|---|---|---|
| Melting | Too high RPM | Reduce speed |
| Fuzzy edges | Dull tool | Use polished O-flute mill |
| Cracking (acrylic) | Heat buildup | Higher feed, lower speed |
6. Composites & Abrasive Materials
Material Behavior
- Extremely abrasive
- Produces dust, not chips
- Requires burr-free cutting
Tooling Requirements
- Coating: CVD diamond
- Geometry: Straight flutes, diamond-cut burr tools
- Edge Strength: High rigidity required
Common Failures & Fixes
| Failure | Cause | Fix |
|---|---|---|
| Edge fray | Wrong flute style | Use burr/toothed geometry |
| Rapid dulling | No diamond coating | Use CVD diamond tools |
High-Value Tooling Selection Table
| Material | Best Flutes | Helix Angle | Best Coatings | Ideal Tool Type | Key Notes |
|---|---|---|---|---|---|
| Aluminum | 2–3 | 40–45° | DLC, TiB2 | High-helix end mill | Prevent BUE |
| Mild Steel | 4 | 30–35° | TiAlN | Flat or corner radius | Balanced forces |
| Stainless Steel | 4–6 | 30–38° | AlTiN | Variable helix | Avoid work hardening |
| Titanium | 4–5 | ≤30° | AlTiN | Corner radius | Shallow DOC |
| Plastics | 1–2 | High | Uncoated | O-flute | Prevent melting |
| Composites | Varies | Low | CVD diamond | Diamond tools | Highly abrasive |
Cutting Tool Selection Playbook
Selecting the right tool requires understanding geometry, material behavior, feature type, and machine conditions. This playbook provides a fast, engineering-ready way to choose the correct CNC cutting tool for any situation.
How to Use This Playbook
Start with the material, then consider the feature geometry, depth, machine rigidity, and surface finish requirements.
Each selection step is designed to remove guesswork and align with common manufacturing best practices.
1. Select CNC Tool Based on Material Category
If machining aluminum
- Use 2–3 flute high-helix end mill
- Prefer DLC or ZrN coatings
- Avoid 4–6 flute cutters
Why: Aluminum needs chip space; too many flutes cause chip welding.
If machining mild steel
- Use 4-flute medium-helix end mill
- Use TiAlN or AlCrN coatings
- Choose corner-radius tools for longevity
Why: Balanced geometry manages heat and cutting forces.
If machining stainless steel
- Use variable helix 4–6 flute end mill
- Use AlTiN coating
- Maintain high feed to prevent work hardening
Why: Stainless steel hardens instantly under low chip load.
If machining titanium
- Use 4–5 flute low-helix end mill
- Nano-composite or AlTiN coatings
- Shallow axial DOC, high feed
Why: Titanium traps heat at the tool tip; geometry must prevent edge failure.
If machining plastics
- Use 1–2 flute O-flute cutter
- Uncoated for razor-sharp edges
- Reduce RPM to prevent melting
Why: Plastics deform from heat; sharp tools and low friction prevent burrs and melting.
If machining composites
- Use CVD diamond-coated cutters
- Straight flute or burr geometry
- Higher rigidity is mandatory
Why: Fibers are abrasive; non-diamond cutters dull instantly.
2. Select Tool Based on Feature Geometry
Pockets (2D/2.5D)
→ Use flat end mills
→ Rough with a rougher → finish with a flat mill
Slots
→ Use flat end mills with strong corner geometry
→ Avoid ball mills (poor slotting performance)
3D Surfacing
→ Use ball nose end mills
→ Use 8–12% step-over for smooth finish
Sharp Internal Corners
→ Use flat end mill
→ Add relief radius if the design allows
Chamfers
→ Use chamfer mills (with 45° or 60° included angle)
Undercuts
→ Use lollipop/undercut cutters
→ Requires 5-axis access
3. Select Tool Based on Toolpath Strategy
Adaptive/Trochoidal Roughing
→ Use high-strength carbide end mills
→ Higher feed-per-tooth preferred
→ Great for steel, stainless, titanium
Finishing Passes
→ Use dedicated finisher with sharp edges
→ Small step-over (3–8%)
Deep Pocketing
→ Use long-reach end mill with reduced helix
→ Reduce radial engagement to limit deflection
4. Quick-Decision Tool Selection Table
| Scenario | Recommended Tool | Reasoning |
|---|---|---|
| 3D contour in steel | Ball nose, corner radius | Strong edges + smooth finishing |
| Fast stock removal | Roughing end mill | Chip segmentation & low load |
| Tight tolerance bore | Reamer or boring bar | Superior roundness & diameter control |
| Thin-walled part | Sharp finisher, low helix | Reduced pulling force |
| High-temp alloy | Low-helix, coated carbide | Prevent heat concentration |
| Cosmetic finish | Ball nose or sharp finisher | Minimal resulting scallops |
5. Final Selection Check
Before choosing a tool, confirm:
- Material machinability
- Required finish (Ra)
- Depth and reach constraints
- Rigidity of setup
- Machine spindle capability
This ensures the chosen tool matches both design intent and manufacturability.
Toolpath Strategy & Its Impact on Tool Performance
The toolpath strategy is as important as tool geometry. Cutting forces, heat distribution, burr formation, and tool life all depend heavily on the chosen CAM path. Selecting the correct strategy reduces wear, prevents breakage, and improves cycle time.
Climb Milling vs. Conventional Milling
| Milling Type | Description | Key Effects |
|---|---|---|
| Climb Milling | Cutter engages with thick-to-thin chip |
Lower tool wear Better finish Reduced heat |
| Conventional Milling | Thin-to-thick chip formation |
More rubbing Higher heat and tool wear |
| Recommended for | Aluminum, steel, stainless, titanium — whenever possible. | |
| Use only when necessary |
Hard scale on surface Workholding requires it |
|
Step-Over & Step-Down Strategy
| Parameter | Condition | Effect |
|---|---|---|
| Step-Over (Radial Engagement) | High step-over (20–60%) | Faster roughing but more tool load |
| Step-Over (Radial Engagement) | Low step-over (5–12%) | Smoother finishing |
| Step-Down (Axial Engagement) | Deep step-downs | Increase vibration |
| Step-Down (Axial Engagement) | Shallow step-downs | Improve stability (important for titanium/SS) |
Adaptive / Trochoidal Toolpaths
These strategies maintain constant tool load, drastically reducing heat and extending tool life.
| Benefit / Use | Details |
|---|---|
| Benefits |
Lower radial engagement Higher feed rates Ideal for hard metals |
| Best Used In |
Stainless steel Titanium Inconel Deep pocketing |
Finishing Toolpaths
Finishing passes require:
- Low step-over (3–8%)
- Sharp finishing tools
- Stable feed to avoid tool marks
Why: Finishing tools rely on minimal deflection; small cutter loads preserve edge sharpness and surface finish.
Toolpath Strategy Failures & Fixes
| Problem | Cause | Fix |
|---|---|---|
| Chatter | Too much radial engagement | Reduce step-over, increase rigidity |
| Heat buildup | Continuous full-width cuts | Use adaptive paths |
| Poor finish | High feed in finish pass | Reduce feed, use finishing tool |
| Tool wear | Wrong strategy for material | Use HSM/adaptive for hard metals |
Common CNC Tooling Problems & How to Prevent Them
Tool failures often originate not from the tool itself but from incorrect cutting parameters, poor toolpath strategy, or mismatched tool–material selection. Understanding these failure modes allows engineers to design and plan machining processes more reliably.
| Problems | Causes | Prevention |
|---|---|---|
| Tool Breakage |
• Excessive tool deflection • Over-aggressive radial engagement • Incorrect chip load (too low or too high) • Weak tool geometry for the material |
• Shorten tool stickout to reduce flex • Reduce step-over for stability • Increase rigidity in fixturing • Use stronger geometries (corner radius, variable helix) |
| Chatter and Vibration |
• Tool resonance from poor rigidity • Long-reach tools • Unstable engagement in pockets or corners • Incorrect spindle speed is creating harmonic vibration |
• Adjust spindle speed to exit harmonic zones • Reduce tool length or increase diameter • Use variable-helix tools • Employ trochoidal or adaptive toolpaths |
| Built-Up Edge (BUE) |
• Material welding to the cutting edge • Too many flutes in aluminum • Dull edges increasing friction |
• Use coatings like DLC or TiB2 • Switch to 2–3 flute cutters • Increase chip load to cut cleanly • Use polished flutes for non-ferrous machining |
| Premature Tool Wear |
• Excess heat concentration • Incorrect coating for the material • Rubbing due to low feed • Chip recutting from poor evacuation |
• Use proper coolant/coolant pressure • Maintain correct feed-per-tooth • Select coatings based on temperature and hardness • Improve chip evacuation with high-helix tools or air blast |
| Poor Surface Finish |
• Tool vibration • Incorrect finishing toolpath • Step-over too high • Dull or chipped tool |
• Use sharp finishing tools • Reduce step-over (3–8%) • Improve tool rigidity • Add a dedicated finish pass |
| Tool Notching (Especially in Titanium) |
• Excessive heat at the tool tip • Hard inclusions in the material • Recutting chips |
• Reduce axial depth of cut • Increase coolant pressure • Use edge-reinforced cutters (corner radius geometry) |
How to Extend Tool Life
Tool life significantly impacts machining cost, cycle time, surface finish, and part consistency. Optimizing tool life is one of the fastest ways to improve manufacturing efficiency without changing machine hardware.
1. Optimize Speeds and Feeds
Why It Matters
Chip load determines whether the tool cuts, rubs, or fractures.
- Too low → rubbing → heat → wear
- Too high → overload → breakage
Best Practice
- Maintain the manufacturer-recommended chip load
- Adjust spindle speed to keep chip formation stable
2. Use Proper Tool Coatings
Coatings increase edge life by reducing friction and thermal load.
| Material | Recommended Coating | Benefit |
|---|---|---|
| Steel | TiAlN | High heat resistance |
| Stainless | AlTiN | Prevents adhesion and thermal shock |
| Aluminum | DLC/TiB2 | Anti-stick, reduces BUE |
| Titanium | Nano-composite | Withstands high temp and abrasion |
3. Reduce Tool Stickout
Why It Matters
Tool deflection increases exponentially with length.
Deflection → chatter → poor finish → premature breakage.
Best Practice
- Keep stickout to the minimum required
- Use stub-length tools for steel, stainless, titanium
4. Improve Coolant and Chip Evacuation
Key Impacts:
- Reduces heat accumulation
- Improves tool edge protection
- Prevents chip recutting
Best Practice
- Use through-spindle coolant where available
- Air blast for plastics and aluminum
- High-pressure coolant for stainless and titanium
5. Use Dedicated Tools for Roughing and Finishing
Why It Matters
- Roughers withstand high load but leave marks
- Finishers are sharp and optimized for surface quality
Splitting the operations:
- Extends tool life
- Improves finish
- Stabilizes dimensional accuracy
6. Adopt Modern Toolpath Strategies
Adaptive/trochoidal paths maintain constant cutter engagement.
Benefits:
- Lower radial load
- Reduced heat
- Longer edge life
Best used in: stainless steel, titanium, hardened steels.
7. Monitor Tool Wear
Why It Matters
Predictive monitoring prevents catastrophic tool failures that damage parts.
Approach:
- Check edges under magnification
- Track spindle load
Use tool-life counters for production runs
Reduce machining cost and improve tool life with Manufyn’s validated CNC processes.
Tool Cost Efficiency in CNC Machining
Cutting tools directly influence manufacturing cost: not only through tool price but also through cycle time, scrap rate, machine uptime, and surface finish quality. Optimizing tool cost efficiency requires balancing tool price, performance, and predictable wear.
Below are engineering-driven methods for reducing total tooling cost without compromising quality.
1. Choose Tools Based on Cost per Part, Not Cost per Tool
Why It Matters
Cheaper tools frequently wear faster, produce inconsistent surfaces, or require slower cutting speeds.
Premium carbide tools with correct coatings often reduce cost per part by enabling faster feeds, longer life, and fewer finishing passes.
Best Practice
- Evaluate cost per part rather than tool sticker price
- Track tool life over batches
- Standardize tool types to reduce setup time
2. Reduce Cycle Time Through Better Tool Engagement
Toolpath strategies that minimize tool engagement and heat buildup allow higher feed rates.
Key Approaches:
- Adaptive toolpaths for roughing
- Optimized step-over for balance between speed and finish
- Use of insert cutters for large surfacing operations
These methods often reduce cycle time by 20–40%.
3. Extend Tool Life Through Coatings and Geometry
Choosing the right coating prevents premature wear, especially in stainless steels, titanium, and high-temperature alloys.
Examples:
- TiAlN extends steel tool life significantly
- AlTiN prevents thermal breakdown in stainless
- DLC eliminates aluminum galling
Matching geometry (such as corner radius tools in steel) also reduces breakage and extends usable life.
4. Use Dedicated Roughing and Finishing Tools
Splitting roughing and finishing operations:
- Preserves finishing tool sharpness
- Reduces rework and inspection failures
- Ensures consistent surface finish
This is a low-cost, high-impact method for scaling production.
5. Plan for Tool Change Intervals
Predictable change intervals prevent:
- Catastrophic breakage
- Tool marks
- Dimensional drift
- Part scrap
Using tool-life tracking or load monitoring is critical for high-volume production.
6. Standardize Tool Libraries Across Parts
Standardization reduces:
- Setup time
- CAM programming time
- Tool inventory cost
Many shops achieve 15–30% cost reduction simply by standardizing cutters used across similar parts.
How Manufyn Ensures Reliable CNC Tooling Performance
Manufyn ensures reliable machining results by reviewing every design through a tooling-focused DFM workflow. Engineers evaluate pocket depth, wall thickness, radii, and material choice to identify risks such as chatter, long-reach tool deflection, or features that require specialized CNC cutting tools.
As a result, potential issues are resolved before machining begins, which improves accuracy and reduces rework.
In addition, Manufyn matches each part with a supplier whose tooling capabilities align with the material and feature requirements. Aluminum parts often use high-helix tools, while stainless steel or titanium require heat-resistant, variable-helix cutters.
This capability mapping ensures stable tolerances, predictable surface finishes, and consistent cutting performance across prototype and production batches.
Manufyn also standardizes toolpath strategies such as adaptive roughing, optimized step-over, and controlled step-down. These strategies lower heat, reduce tool wear, and improve dimensional stability. Finally, inspection processes are aligned with tooling workflows, ensuring bore tolerances, surface finishes, and positional accuracy are measured exactly as intended.
Consequently, customers receive CNC-machined parts that are repeatable, reliable, and ready for assembly.
Frequently Asked Questions
What are CNC cutting tools and why do they matter in machining?
CNC cutting tools are the toolholders and cutters used to remove material during machining. They determine accuracy, surface finish, cycle time, and tool life. Correct tool selection ensures stable machining, lower heat generation, and predictable tolerance control.
How do I choose the right tool for a specific material?
Tool selection depends on hardness, thermal behavior, and chip formation. For example, aluminum requires 2–3 flute high-helix tools, while stainless steel performs better with variable-helix, coated cutters. Matching tool geometry to material properties prevents chatter, tool wear, and poor finish.
Why do machining tools fail prematurely?
Common causes include excessive deflection, low chip load, poor chip evacuation, and incorrect coatings. Using the right flute count, helix angle, and coolant strategy significantly reduces heat and extends tool life.
Which CNC milling cutting tools are best for 3D surfaces?
Ball nose end mills are ideal for 3D contours because they maintain constant engagement and produce smooth finishes. In addition, small step-over values improve accuracy and reduce visible scallops.
How does toolpath strategy affect CNC tooling performance?
Toolpaths determine how forces and heat are distributed. Adaptive or trochoidal paths lower radial load and extend tool life, while optimized finishing paths improve surface quality. Therefore, choosing the right toolpath is as important as choosing the right tool.
How does Manufyn ensure high-quality machining surface finish and dimensional accuracy?
Manufyn evaluates tooling feasibility during DFM, assigns parts to suppliers with correct tooling capability, and aligns inspection standards with machining processes. As a result, customers receive consistent tolerances, reliable finishes, and repeatable performance across batches.
Bring your design to life with reliable CNC machining, optimized tooling, and consistent quality.
Upload your CAD file to Manufyn for a fast DFM analysis, tooling recommendations, and an accurate manufacturing quote—all within 24 hours.