Manufyn optimizes parts for accurate CNC turning
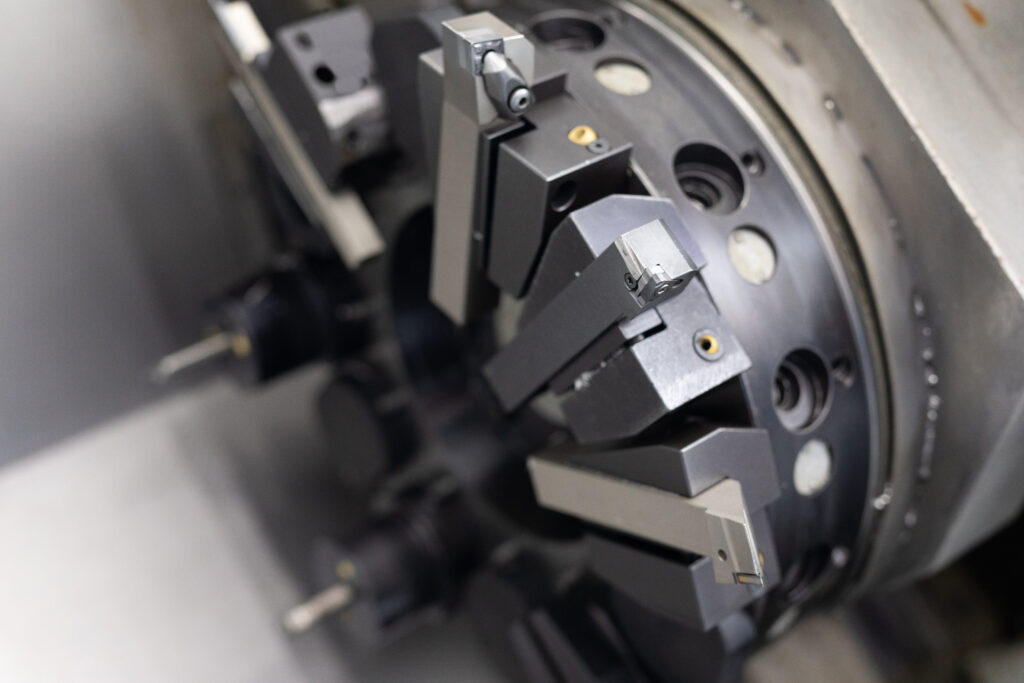
CNC turning isn’t milling on a different machine — it’s its own engineering discipline. While milling cuts around a static part, CNC turning machining rotates the material and shapes geometry around a centerline. That single difference changes everything: tolerance behavior, clamping strategy, tool geometry, surface finish, and how features are designed.
A part that looks “perfect” in CAD can be impossible to turn if:
- The centerline isn’t respected
- Length-to-diameter ratios aren’t stable
- ID features are unreachable by boring bars
- Threads have no relief for insert exit
- Finish expectations fight feed/inserts/material
This guide removes guesswork by teaching the rules that make turned parts accurate, stable, and manufacturable — not just “nice on screen.”
At Manufyn, we don’t just turn CNC programs — we design turned parts that stay dimensionally stable under tool pressure, rotation speed, and thermal load. This is what separates production-ready turning from trial-and-error machining.
If a part is going to be made on a turning CNC machine, the design must reflect rotational logic, not just modeled shapes.
Rule #1 — Design Around Centerline Logic (Turning’s Golden Rule)
Every turning operation takes place around a centerline. If a feature cannot be located, referenced, or accessed cleanly around that axis, it will either:
- require a secondary milling operation,
- introduce runout,
- or fail tolerance completely.
Centerline Design Requirements
- OD, ID, grooves, and seats must reference a single axis
- Asymmetrical features → secondary op or turn-mill center
- Don’t dimension off “pretty” surfaces — dimension off the centerline
- Chamfers at entry points must match insert approach angle
- Axial faces must support tool entry without collision path risk
Features That Break Turning Logic
- Offset pockets with no re-index plan
- ID grooves smaller than insert radius
- Shoulders with no relief → tool crash zone
- Blind IDs with no chip escape path
- Cosmetic fillets with impossible insert approach angles
If the centerline is incorrect, the part will never run true, regardless of the machine.
This is the foundation of practical CNC turning, because true dimensional accuracy starts with centerline integrity — not tolerance tightening.
Unsure if your part respects turning centerline geometry?
Send your CAD — Manufyn will flag runout risks, relief issues, and tool entry conflicts.
Rule #2 — Match Material to Insert Behavior (Cutting Physics First)
In milling you fight the part. In turning you fight the material — because insert geometry, chip form, and surface finish depend on how the stock behaves at speed.
Choosing the wrong material for your tolerance or finish requirement guarantees:
- burring at edges,
- heat swell mid-pass,
- taper from bar deflection,
- unclean thread profiles,
- dimensional drift after cool-down.
Turning Material Behavior Guide
| Material | Behavior in Turning | Impact on Design |
|---|---|---|
| Aluminum | Fast chip, clean finish | Easy sealing surfaces, great for cosmetic parts |
| Brass / Copper | “Dream materials” | Best for threads, knurling, electronics hardware |
| Mild Steel (MS) | Stable & predictable | Good for shafts, bushings, pins |
| Stainless Steel | Generates heat rapidly | Needs relief angles & realistic tolerance calls |
| Plastics (Delrin / ABS / PC) | Deflect under clamp pressure | Support length + low DOC required |
Insert Compatibility Rules
- Radius must match corner fillets (no invisible radii)
- Internal threads require relief land for tool exit
- Negative rake inserts → strength, not cosmetics
- Positive rake inserts → finish, not strength
Correct pairing of material + inserts is the hidden foundation of successful machine turning. Without that match, tolerances drift and finish collapses.
Not sure if your material will cut cleanly or hold tolerance?
Manufyn recommends the right material + insert combo before machining begins.
Rule #3 — OD/ID Tolerance Logic & Deep Bore Reality
CNC turning can produce extremely accurate diameters — but OD and ID do not behave the same during machining. Designers often give uniform tolerance bands to both, but rotational physics doesn’t allow it.
OD vs ID Tolerance Truth
| Feature Type | Stability | Why |
|---|---|---|
| OD (Outer Diameter) | More stable | Tool pressure is supported externally |
| ID (Inner Diameter) | Less stable | Boring bars flex, chatter, limited chip escape |
Deep ID bores are the #1 cause of tolerance drift in CNC turning machining.
The longer the boring bar relative to the bore diameter, the higher the risk of:
- tapering,
- chatter,
- bell-mouth effect,
- and loss of roundness.
Depth Rules for Internal Turning
| Bore Depth | Risk | Solution |
|---|---|---|
| ≤ 3× diameter | Low | Any turning center works |
| 4–6× diameter | Medium | Use support, adjust feed, controlled DOC |
| 7–10× diameter | High | Requires special boring bars or step boring |
| 10×+ diameter | Critical | Ream, hone, or rethink geometry |
The bore determines the machining method — not the drawing.
Correct OD/ID planning is what separates standard parts from precision-ready CNC turning machining.
Rule #4 — Length-to-Diameter Ratio Controls Stability (The L:D Law)
If CNC milling has deflection rules, turn CNC has stability rules — and they start with the L:D ratio.
The longer and thinner the part, the more the material behaves like a tuning fork under tool pressure.
L:D Ratio Guidelines for Turning CNC Machine Work
| L:D Ratio | Outcome | Design Decision |
|---|---|---|
| 3:1 | Safe | No extra support needed |
| 6:1 | Moderate | Tailstock strongly recommended |
| 8:1 | High Risk | Steady rest / follow rest required |
| 10:1+ | Critical | Rework design or change machining method |
What Happens When You Break the Ratio
- The part bends under tool pressure
- Taper forms from deflection
- Thread profiles distort
- Roundness collapses
- Surface finish streaks → visual chatter marks
How to Make High L:D Parts Work
- Add a supporting hub, grip land, or sacrificial section
- Increase diameter in non-critical zones for stiffness
- Add center-drill pockets for tailstock engagement
- Shift tolerance banding to match real stability zones
A drawing that ignores L:D ratio is a rejection waiting to happen.
Any part expected to run on a turning CNC machine must be designed around length, rigidity, and rotational stability — not visual symmetry.
Does your part risk bending, tapering, or chatter?
Manufyn runs an L:D stability check before machining so you don’t lose tolerance mid-run.
Rule #5 — Threading & Relief Geometry: Give the Tool Somewhere to Exit
Threads fail more in turning than in milling because designers model thread profiles without planning tool escape. Inserts need clearance to enter, cut, and exit. Without a relief groove or undercut, the insert collides, tears material, or leaves incomplete thread profiles.
Threading Requirements for CNC Turning
- Relief groove required for internal threads (the tool needs landing/exit zone)
- External threads need edge distance to prevent tearing + tip rollover
- Blind-hole threads need depth clearance > pitch + insert thickness
- Internal threads need boring-bar access clearance, not just diameter
Thread Relief Geometry Cheat Sheet
| Thread Type | Minimum Relief Groove Width | Why |
|---|---|---|
| External (OD) | ≥ 1.5× pitch | Tool exit + profile cleanup |
| Internal (ID) | ≥ 2× pitch | Boring bar clearance + chatter reduction |
| Blind Thread | Pitch depth + insert nose radius | Prevents crash on final pass |
Design Mistakes That Break Threads
- Zero relief → insert crashes or scuffs profile
- Thread starts too close to a shoulder → incomplete profile
- Blind-hole threads with no exit → tapering + chip packing
- Expecting thread perfection in plastics without reinforcement
Threads fail at the relief groove, not the thread profile.
Good threading rules = successful CNC turning machining, especially when thread precision defines sealing or assembly.
Rule #6 — Surface Finish Is a Functional Specification, Not Aesthetic
On a turning CNC machine, finish is predictable if the part is designed for insert angle, feed, and material behavior. Finish isn’t cosmetic — it affects sealing, lubrication, sliding, bearing performance, and even torque transmission.
Functional Finish Targets
| Use Case | Recommended Finish (Ra) | Why It Matters |
|---|---|---|
| Sealing faces / O-ring seats | Ra 0.4–0.8 μm | Leak prevention, pressure retention |
| Bearing / sliding shafts | Ra 0.2–0.6 μm | Reduces friction, extends life |
| Cosmetic housings | Ra 1.2–3.2 μm | Visual, non-functional surfaces |
| Plastic mating faces | Ra 0.8–1.6 μm | Prevents galling or stick-slip |
Design for Finish Reality
- Call finish before tolerance — finish removes material
- ID bores need post-turning (hone/ream) for sealing reliability
- Don’t request Ra < 0.4 μm on unsupported L:D parts
- Hard materials need smaller insert radius for finish consistency
Finish is a dimension. If finish changes, the dimension changes.
This is why sizing, sealing, and finish planning must be part of every turn CNC design — not an afterthought.
Does your finish spec match your tolerance + material choice?
Manufyn validates sealing faces, lubrication surfaces & coating impact before machining.
Rule #7 — When Straight Turning Isn’t Enough (Turn-Mill, Live Tooling, Grinding)
Not every “turning part” is a turning part. Some geometries look turnable in CAD, but in production they require:
- live tooling for flats/pockets,
- milling for keyways or wrench engagement,
- grinding for precision shafts or bearing seats,
- or even honing for seal-grade internal finishes.
Design must decide the process, not assume it.
When to Move Beyond Basic CNC Turning
| Requirement | Upgrade Needed | Why |
|---|---|---|
| Flats / Pockets / Cross-Holes | Turn-Mill / Live Tooling | Requires toolpath outside centerline |
| Bearing / Shaft Seating | Cylindrical Grinding | Holds roundness + taper tolerance |
| Sealing Bore / Fluid Fit | Honing / Reaming | Removes taper + waviness |
| Tight ID Tolerances (< ±0.01mm) | Precision Boring Bars | Prevents bell-mouth drift |
| Offset Features / Asymmetry | Hybrid Operations | Turning alone can’t access features |
If a drawing demands more than rotation can provide, the operation must evolve — or the part must.
The worst thing you can do is design a milling problem for a turning machine.
This is where CNC turning machining gives way to turn-mill or grinding — by design, not by accident.
CNC Turning Design Checklist
Before sending a turning drawing for RFQ or machining, confirm:
Geometry
- Centerline referenced correctly
- Chamfers match insert entry angle
- Reliefs exist for shoulders, grooves, threads
Material + Insert
- Insert geometry compatible with material
- Edge distance safe for threads & seats
- Boring bars supported for ID stability
Tolerances
- OD tighter than ID where applicable
- Deep bores matched to tool length rule
- No “perfect” tolerances on unstable geometry
Stability
- L:D ratio validated (3:1 → 6:1 → 10:1 rules)
- Tailstock or rest planned for long parts
- Grip-land or support zone allowed if needed
If this checklist fails, the part will fail in production. A part designed for machine turning will always reflect radial physics, not aesthetic modeling.
Upload your turning file for Manufyn’s full manufacturability review.
We confirm:
Centerline logic
OD/ID tolerance safety
L:D stability
Thread/relief feasibility
Material + insert pairing
Frequently asked questions
What is CNC turning and how does it work?
CNC turning is a subtractive machining process where the workpiece rotates against a cutting tool to remove material. This process is ideal for cylindrical parts like shafts, bushings, and threaded components, unlike milling which cuts around a stationary part.
What features are best suited for CNC turning machining?
Turning excels at outer diameter (OD) profiles, inner diameter (ID) bores, shoulders, tapers, threads, and grooves. Features that extend from the centerline are typically handled by turn-mill machines or secondary milling operations.
How do I design parts for minimal runout in CNC turning?
Design for precision by referencing all critical features to a single centerline, adding relief grooves, minimizing unsupported lengths, and avoiding features that demand asymmetrical tool access. If runout is unclear, a design review can help.
What are common L:D (length-to-diameter) ratio rules in turning design?
L:D ratios guide stability:
- Up to 3:1 — generally stable
- 4:1–6:1 — moderate risk, support advised
- 8:1+ — high risk, needs steady rest or redesign
These ratios help prevent chatter and taper during machine turning.
How should OD and ID tolerances be set for turned parts?
OD tolerances are usually tighter because tool contact is more stable. ID tolerances are harder due to boring bar flex and chip evacuation limits. Many designs call for reaming/honing post-turning for consistent ID precision.
What materials are easiest to machine on a CNC turning machine?
Materials like aluminum, brass, and mild steel (MS) machine cleanly with predictable results. Hard metals like stainless steel require insert strategy and thermal compensation. Plastics may deflect without proper support.
Why is a relief groove necessary for internal threads in turning?
Relief grooves give the threading insert a safe exit path. Without them, the insert can collide with shoulder faces, tear threads, or deform profiles. Groove size is typically based on pitch + tool geometry.
How do surface finish requirements affect CNC turning design?
Surface finish is functional — not cosmetic. Ra values impact sealing, wear, friction, and assembly behavior. Feed rate, tool nose radius, and insert choice all determine attainable finish on a turning CNC machine.
